How to string a squash racquet
Stringing a squash racquet can be quite a confusing experience for the
first dozen or so racquets you string.
After you get the hang of it, it
becomes easier. The hardest part is getting the first few main strings
strung. Once they are done, the rest is almost a piece of cake and quite
intuitive. I have shown the steps needed to get past this first critical
stage.
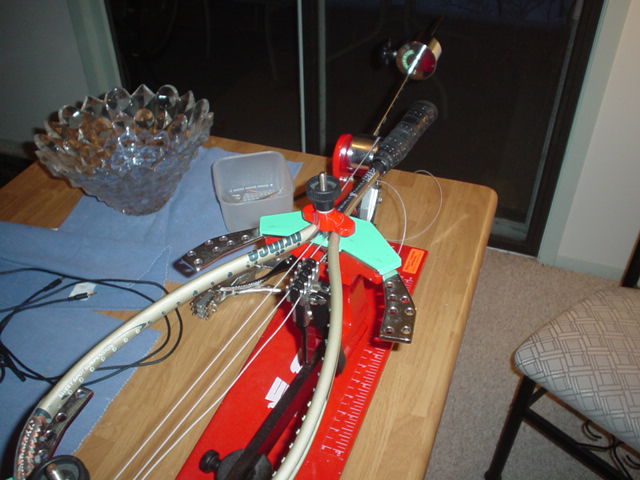
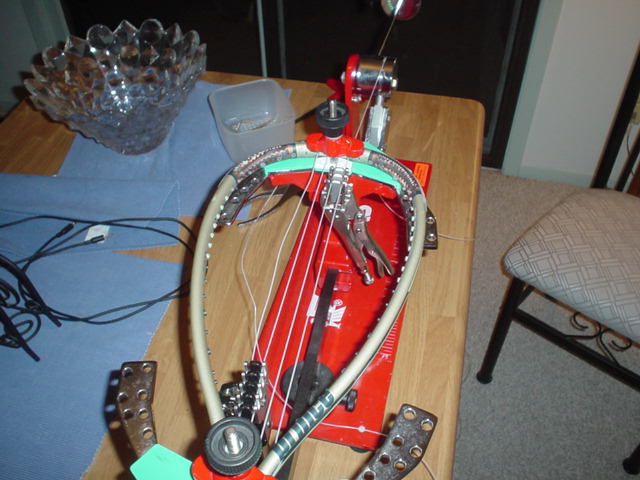
The machine I have is the Eagnas DEN3600.
I have seen it on ebay for sale for under $200 including shipping. I think it is a fine machine.
First cut out the old strings by cutting through all the crosses then all the mains and pulling
out the strings. You can buy squash string online . You typically need 30 feet of string. Sometimes
you can get by with 27 feet, but to be safe use at least a 30 feet length of string. There is a lot of debate
on what squash string is best. I just buy whatever brand name is on sale, i.e Prince, Head, Wilson ,
Ashaway, Technifibre etc. On ebay you can often find these on clearance for $1-2 per 30' reel. More expensive strings like Technifibre and Ashaway do feel and play better , but
it is a difference only an advanced player will notice and appreciate.
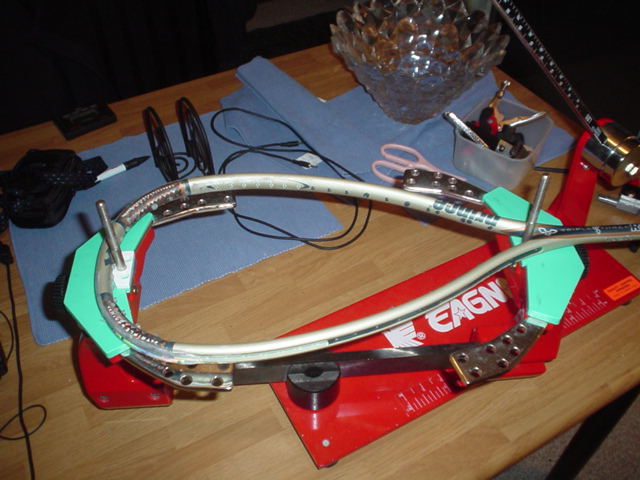
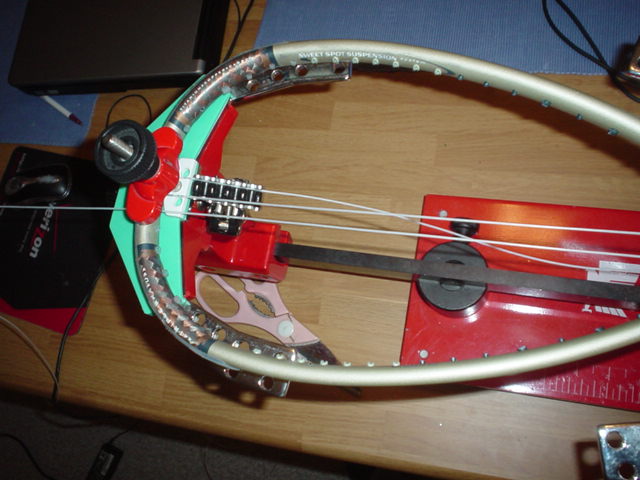
You only need to mount the racquet at the two points shown above. Your machine may have additional mounts
to hold the side of the frame.
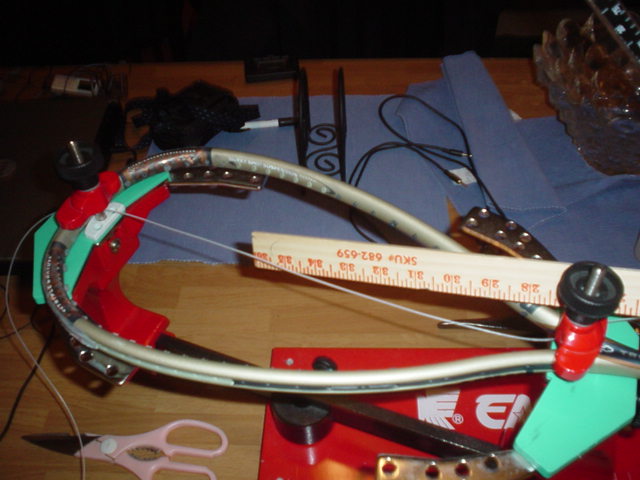
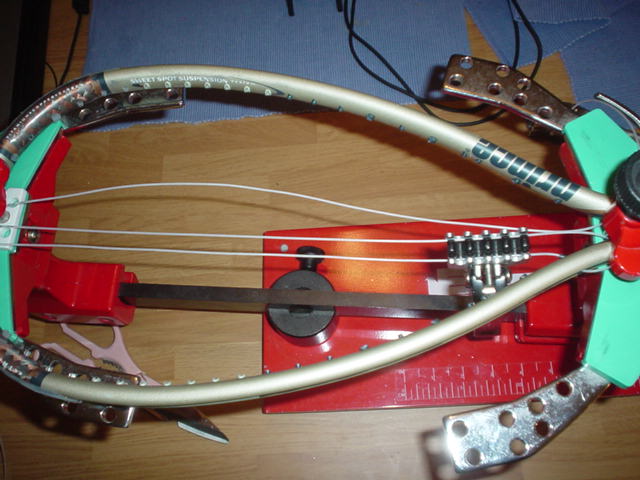
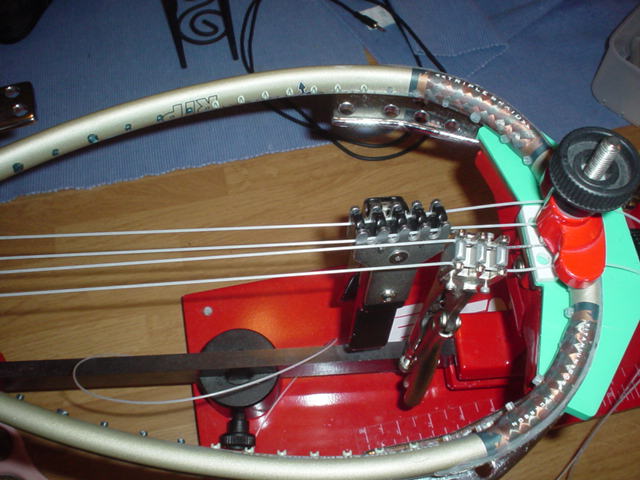
After you untangle and straighten the string, string 10 feet of it through one side as shown above. Start from the head
and measure out 10 feet of string through the throat.
After measuring out 10 feet of string , place a clamp at the head to mark the point where 10 feet of string starts from.
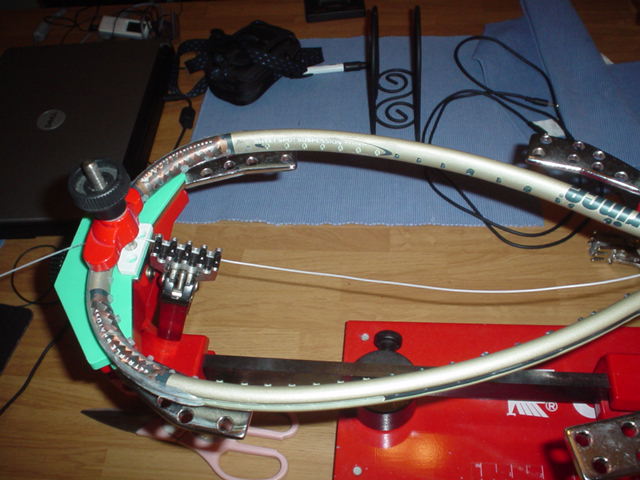
Next string the remaining 20 or so feet of string through the throat and back through the head as shown above.
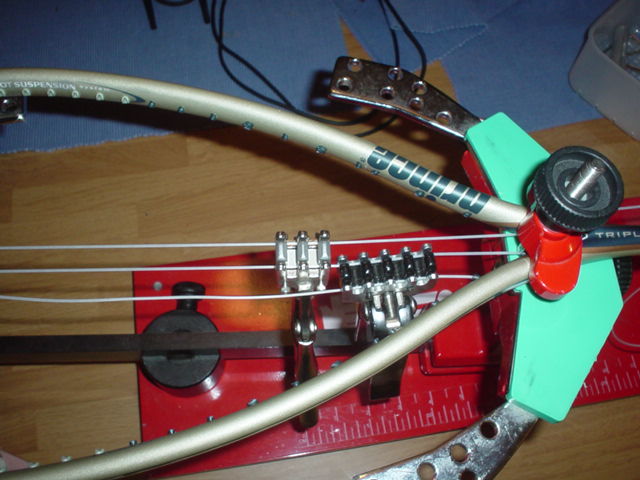
Now here comes the tricky part. Move the clamp from the head to the throat as shown exactly above. Keep in mind we have not
done any tensioning at this point, so the strings should all be loose. Try and hand straighten the strings before closing
the clamp to eliminate any slack between the clamped ends of the string.
We are now ready to tension the first main as shown above. I usually tension my racquets between 24 to 28 lbs depending on the
racquet. Any lower and you lose control. Any higher and you shrink the sweet spot making it difficult to play touch shots. Keep in mind 28 lbs on
a large head racquet may feel looser than 28 lbs on a small head racquet.
So after you tension the first main, place the clamp as shown above to hold its tension. Then take that same string and thread it back to the head.
After stringing the same main string through the head, tension it and clamp it as shown above.
Then tension the other main string on the other half of the racquet. Clamp it by moving the clamp from the throat to the head as shown above, i.e the
black clamp in the picture.

Now the remaining mains are a piece of cake. Just alternate tensioning one main on each side. In other words string one main, tension it, then string the other main
on the other half of the racquet and tension it, then repeat. When you hit the crosses you just tie off the string with the short length left, i.e the side
which you strung the 10 feet of string through.
Look for a big hold ( aka grommet ) where you can tie off your string by tieing a double knot
with an already tensioned main string. Sometimes it may be difficult to thread the string through the tie-off grommet. You can use an owl, or a needle shaped tool to wedge into that hole to try and
make it bigger. Be careful not to accidentally poke the existing string there or it may snap. Also, tension the last main 10-30% higher since you will lose tension when you tie it off.
Then start the crosses with the remaining string left. To do the
first cross you will have to string two crosses then tension and clamp.
A reader sent in this optional tip you can try.
When putting in the crosses, always thread a second loose
string, then tension the previous one. If you tension the
last one put in, the next one that you thread will be tight
to pull through with more friction as the last one tensioned
went up and down in the opposite direction.
I usually listen to audio books while stringing as it takes almost a good hour to do one.
You have to be creative to figure out how to string an unusual racquet. The first few
mains are usually straightforward , but then you need to examine the
last ones closely. Usually the last ones have to skip some holes on the
top. Just ask yourself if the pattern would look normal if I put it
through this hole or that one?
Best way to cut your time is find a racquet that is easy to string .
Strings with fancy fan patterns can be very confusing to figure out and
difficult to get the strings through the holes.Simple cross-patterns are
the best.
Do not try and pull two mains or two crosses at once. This will create a haphazard sweet spot
and result in lots of frustration when hitting the ball!
|